[PS Tutorial] How to make a smooth image
Hello! I'm back guys~ long time no see=_= Well, now I'm back with a tutorial for you! No, not blog tutorial. But it's tutorial for photo editing. Yep, check it out~
 |
| what I mean 'smooth image' is this. |
 |
| before, it was look like this. |
See the difference? No? Nah, forget it, just check the tutorial haha(?)
1. Okay, the first thing you need to do is open your photoshop.
2. Then, open the image/photo that you want to edit it. I'm gonna use Minah's photo.
3. It'll look like this. Now click Ctrl+J on your keyboard. Do it for 2 times. It's for adding the same layer.
 |
|
4. If you already done the third step, it will look like this. Now, click the
second layer like in the picture. Then,
click filter > sharpen > sharpen.
5. Now, click the first layer like in the picture. Then, click filter > blur > blur. Do it many times, you can just click Ctrl+F for about 7 times.
6. Done? It'll look like this. It's blurry, right?
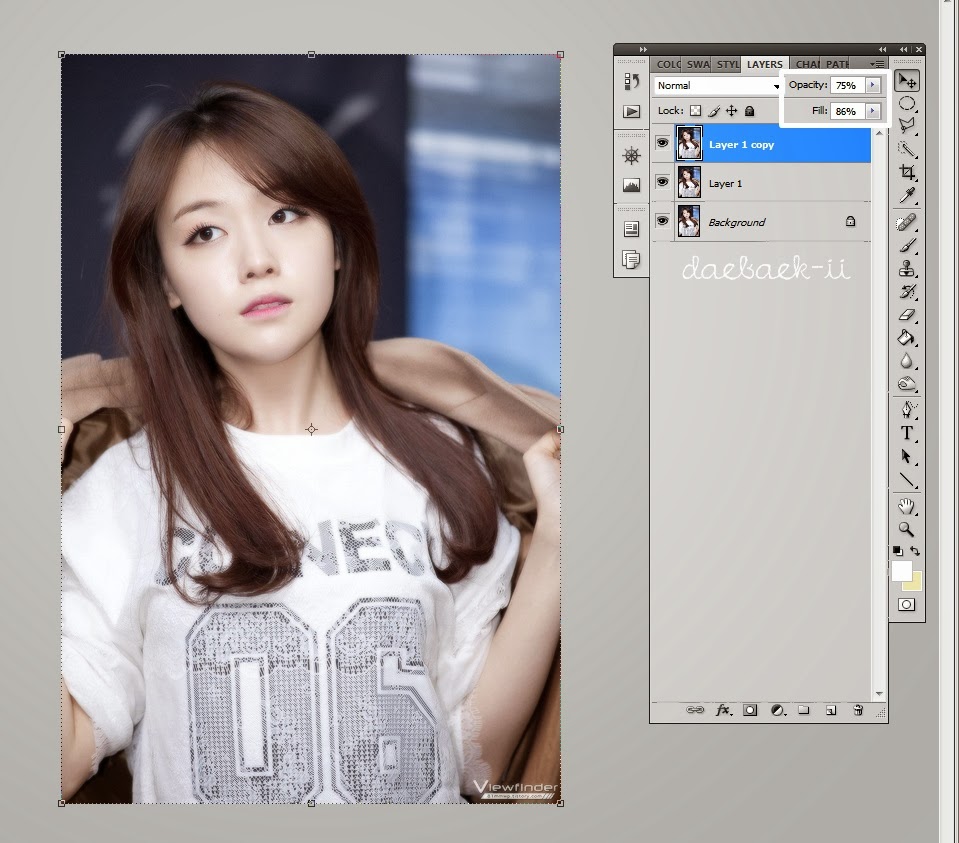
7. Now, click the first layer like in the picture. Then, adjust the Opacity and the Fill. (Look at the picture) I use 75% for the Opacity and 86% for the Fill.
For the adjusting thingy like the 2 pictures above, it's up to you! Just adjust it until it looks not so blurry. Just make it soft~ And you're done!
 |
| Before, it looked like this. |
 |
| Now, it looked like this. |
Simple, isn't it? You can also add psd coloring if you want. I added psd & textures and it looks like this.
Got problem? Still don't understand? Ask me on the comment box! Thank you~
Labels: tutorials
[PS Tutorial] How to make a smooth image
Hello! I'm back guys~ long time no see=_= Well, now I'm back with a tutorial for you! No, not blog tutorial. But it's tutorial for photo editing. Yep, check it out~
|
| what I mean 'smooth image' is this. |
|
| before, it was look like this. |
See the difference? No? Nah, forget it, just check the tutorial haha(?)
1. Okay, the first thing you need to do is open your photoshop.
2. Then, open the image/photo that you want to edit it. I'm gonna use Minah's photo.
3. It'll look like this. Now click Ctrl+J on your keyboard. Do it for 2 times. It's for adding the same layer.
|
|
4. If you already done the third step, it will look like this. Now, click the
second layer like in the picture. Then,
click filter > sharpen > sharpen.
5. Now, click the first layer like in the picture. Then, click filter > blur > blur. Do it many times, you can just click Ctrl+F for about 7 times.
6. Done? It'll look like this. It's blurry, right?
7. Now, click the first layer like in the picture. Then, adjust the Opacity and the Fill. (Look at the picture) I use 75% for the Opacity and 86% for the Fill.
For the adjusting thingy like the 2 pictures above, it's up to you! Just adjust it until it looks not so blurry. Just make it soft~ And you're done!
|
| Before, it looked like this. |
|
| Now, it looked like this. |
Simple, isn't it? You can also add psd coloring if you want. I added psd & textures and it looks like this.
Got problem? Still don't understand? Ask me on the comment box! Thank you~
Labels: tutorials


 hello humans! bbh, khc, kth, skj, jjk, pjm, nwh ruin my life.